logo-diyrepi-normalicon-diylogo-diyshoplogo-diyrepi

DIYREPiにログイン

Have a nice DIY

パスワードをお忘れの方

― または ―


ユーザー登録はお済みですか?

無料ユーザー登録はこちら

移動できるプリンター台を作ろう!

カテゴリー:プチDIY/その他
制 作 費 用:¥
完成サイズ:W×D×H(mm)
Recipe main image f0bb8b13 5130 4179 a5a6 54e14d05b92f

プリンターはどこに置いてますか?
もともと棚の上に置いていたのですが、オンライン授業で娘がよく印刷をするので、移動できるプリンター台を作りました。
下には収納スペースがあるので印刷に必要なものはもちろん他にもいろいろ収納できます。

step1
Recipe step image ee8089da 7d16 490c 9041 b72c6eff2cfb

材料はこちらです。

step2
Recipe step image 9a9fa4d7 0a5d 4ee4 b92c c02d70018bc9

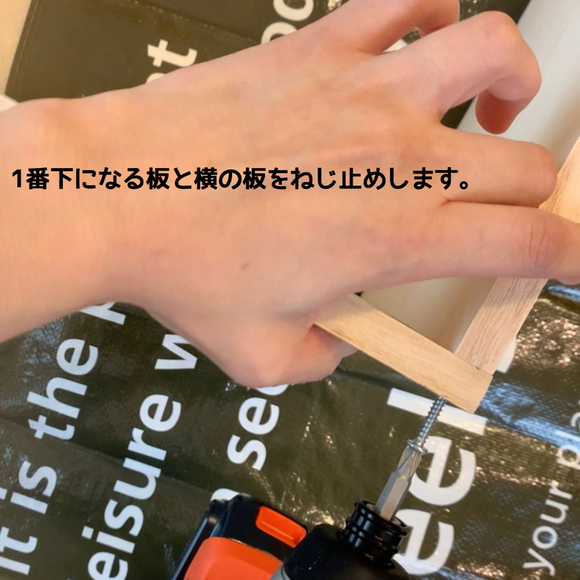
片面2ヶ所ねじ止めします。
1番下になる板→ 35×45の板。
横になる板→ 35×65の板。

step3
Recipe step image d601f20b 1eb0 412d abd7 2a8418fdcdc8

片面2ヶ所ねじ止めします。

step4
Recipe step image 0a781af5 4444 4528 9782 aebfb287dba4

片面2ヶ所ねじ止めします。

step5
Recipe step image cea8c36d c198 45e8 a62c ce8774e8e115

全部ねじ止めするとこんな感じになります。

step6
Recipe step image 7786f117 75fc 40bb a9ae a76bbef0193c

step7
Recipe step image a1a6e2bf 7a86 42fe 9be0 dcd0c172226e

step8
Recipe step image 11334d06 cada 4053 b15f 10229812c477

step9
Recipe step image 8136678b 9060 4cb0 b322 adf74d252c3e

step10
Recipe step image 72cbe7db 5d1c 44a2 9102 75f7a6a5359a

step11
Recipe step image 57fd656c e77b 40fc 8093 229436f02aa4

step12
Recipe step image b2110364 6975 4ad4 8d66 e9b63bfde2fe

完成です。

step13
Recipe step image cadddbbc 24b0 4c1e aa7a de72d5d901d4

これで移動も楽にできます。

step14
Recipe step image 681e7d42 9fcf 4070 aabb abd485b8c1a1

ログインまたは無料ユーザー登録するとコメントができるようになります。

関連DIYレシピ

みんなのアイデアフォト「れしぴく」

このレシピに関連するアイデアを投稿しよう
れしぴくを投稿する

いいね一覧